If you are restoring your motorcycle, you may have seen or heard about anodised bolts but did not know all the talk is about. Maybe you would like to know what colour you can get anodised fasteners in, or what type of material they are available in. Hopefully this blog post will clear up some of your questions with regards to anodised nuts and bolts.
The most important decision to make is what material the nuts and bolts should be manufactured from. If you are looking for anodised fasteners your choices are limited to aluminium and titanium. This is due to the fact that not all materials can be anodised.
If the nuts and bolts is to be used in high impact applications such as brakes or suspension mounts, Titanium should be used as it has a stronger tensile strength. If you are fastening wind shields or the petrol cap for example, aluminium nuts can be used.
The second important consideration when choosing the type of anodised fasteners is the colours that are available in the different metals. Mots times aluminium bolts will have a bigger range of colours than the Titanium counterparts. This should however not interfere with your safety considerations, if the required colour is not available in Titanium for a high high stress application, rather opt for a silver or alternative available colour in Titanium or stainless steel.
Some people may wish to ignore bolts that are anodised a colour and opt for the ordinary silver ones. This is especially true when doing vintage reproductions or similar motorcycles. Even in this case, the plain silver anodised bolts will have an advantage over plain steel bolts, and that is they do not tarnish or rust.
Rust is not an issue with bolts that have been anodised because of the specialised chemical process they are put through. With out discussing the process of anodising, the parts are placed into a solution with current running through the parts and solution. This process also chemically hardens and seals the metal, which is why it will not show signs of tarnishing or rust.
Thursday, 15 March 2012
Thursday, 1 March 2012
Choosing your graphic application method
When choosing on the
design for your newly rebuilt custom motorcycle you have a number options.
Will the design be painted on, or will it be done with vinyl stickers.
There are good and bad points with each and that is what we will be
looking at today.
Having your design painted on can be considerably more expensive than
using vinyl stickers. Some factors that go into the pricing is the tools that are needed for spray painting, and the vast artistic skills required to
paint a design onto a motorbike. This is normally out of the reach
of most hobbyists who enjoy doing the work themselves.
Time constraints may play a role in what you are able to do. While a nice custom bike could take up to two weeks or more, applying vinyl decals will not take more than a day or two for a novice and only a few hours if you have worked with vinyl decals before.
Something to think about is how easy it would be to replace a part or the whole design should it become damaged for some reason. For stickers it is a simple matter of removing the scratched section and ordering a replacement from a local supplier that would be exactly the same as the original. With painted on graphics you will need the specialised tools and artistic skills along with trying to match possibly faded paint colours.
Using vinyl decals for
your motorcycles graphics on the other hand is much simpler for the
average home rebuild. Vinyl motorcycle stickers are available from a number of
suppliers, including customised designs. Due to the fact that they
are printed from a computer the costs are considerably less,
sometimes by a factor of ten or more.
Hopefully these tips have helped with deciding what sort of graphics you are going to doing on your custom or race replica motorcycle.
Top 5 motorcycle graphics in World Superbikes 2012
With the first World Superbike race of 2012 recently underway, now would be a good time to have a look at the five best motorcycle graphics of the SBK season. These are my picks for 2012 and some of the reasons why. What do you think?
1. Ducati Red Devils Roma
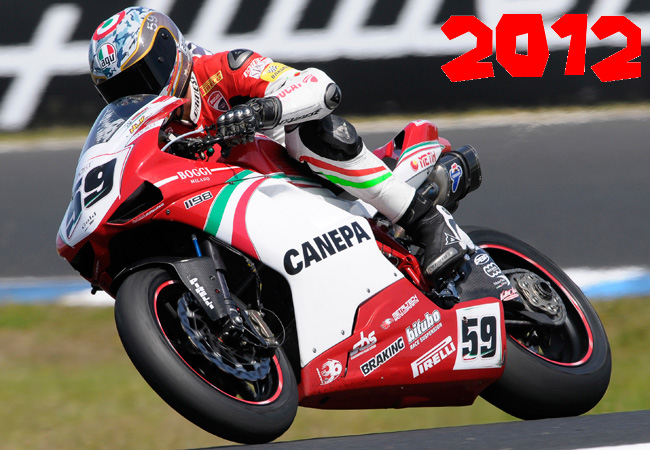 |
| SBK Red Devils graphics |
2. Honda Pro Ride Motorsports
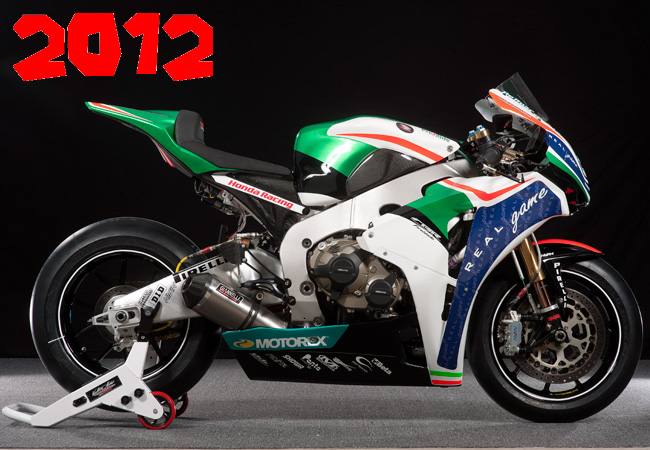 |
| SBK Pro Ride Motorsports graphics |
3. Aprilia ParkinGO MTC
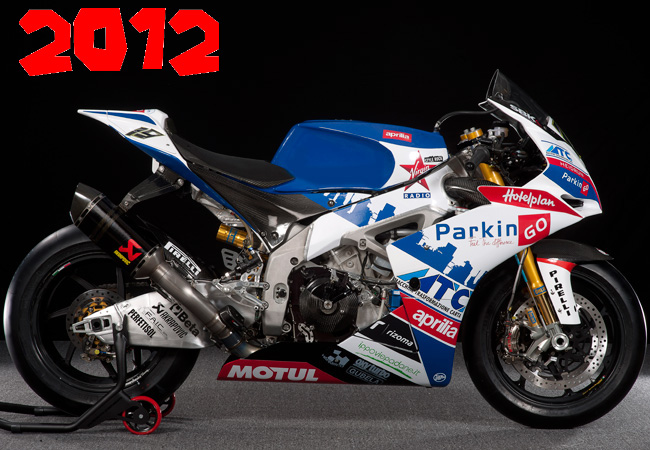 |
| SBK ParkinGO MTC graphics |
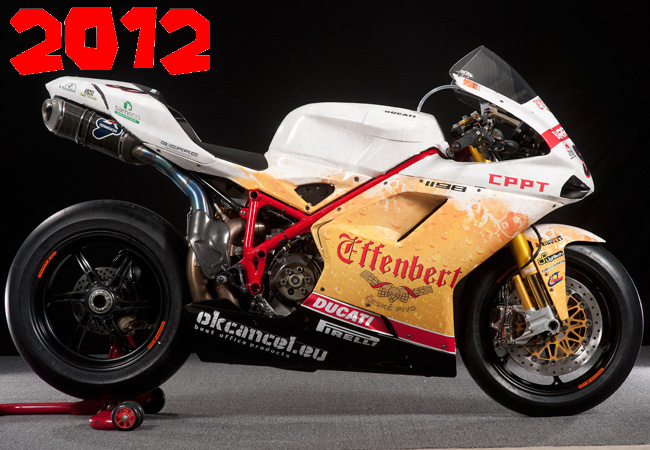
4. Ducati Liberty Racing Effenbert
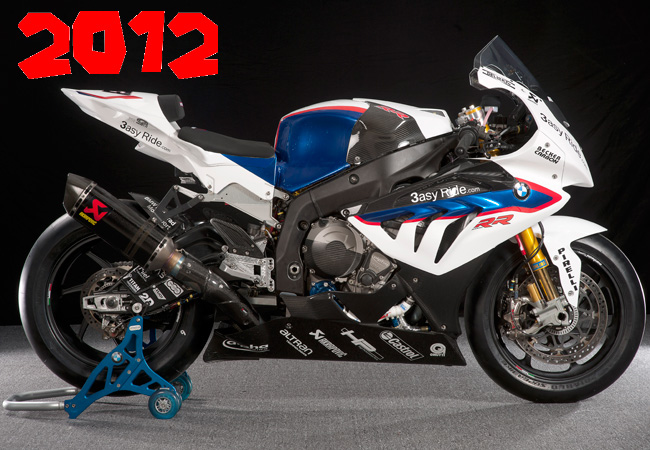
5. BMW Motorrad Motorsport
Which are your favourite SBK graphics for the 2012 Superbike season?
Subscribe to:
Posts (Atom)